A dull chainsaw is inefficient and downright dangerous to use. Even one that’s slightly dull can be tiring to use and will cause you to burn more fuel than you would otherwise. If you suspect your saw’s chain is dull, it probably is. Stop what you’re doing and sharpen it by filing the cutters on its chain. It’s not hard to do.
💡Here’s telltale sign that your chainsaw needs sharpening. Examine the wood being expelled by the saw. A sharp chainsaw sprays out thin shavings. A dull saw spews out fine wood dust. If the saw is cutting very slowly and is not pulling itself through the log, while producing saw dust (not chips), it’s dull and needs to be sharpened.
Basics of Chain Sharpening
To correctly file your saw chain you have to know two things. First, you have to know what diameter file to use. The cutting surface on a chainsaw’s cutter is a curved bevel, and the file fits into that curved bevel. When you push the file forward over the bevel, you refresh the beveled surface, leaving behind a clean sharp edge that acutally shaves the wood away as it flies past. There are several chainsaw file diameters, but two typical sizes are 5/32 and 7/32 of an inch.
Your owner’s manual will list the specifics of the chainsaw’s chain (and bar) to help you match a saw file to the chain. If you lack the manual, read this simple tutorial on how to identify the saw chain on your saw. Then buy a file to match. When in doubt, bring the saw to a servicing outdoor power equipment dealer and have the dealer look the saw over to select the right file.
The second thing you need to know is that filing changes the geometry of each cutter. Every time you file a cutter, you’re reshaping it slightly. Notice in this chainsaw cutter diagram that filing the beveled surface of each cutter changes the cutter’s relationship to the depth gauge (also called the raker). The depth gauge is the portion of the cutter that limits the amount of wood that the cutter removes. Understanding this is extremely important. As you sharpen the beveled surface on each cutter, you reduce the height of the cutting surface relative to the depth gauge. Every time you file, the tooth will remove slightly less wood. Therefore after three sessions sharpening the cutter, you also have to file down the height of the depth gauge so that the cutter will continue to remove the right amount of wood.
Note that if you file away too much metal from the depth gauge, the saw could be dangerous to use. That is, each tooth will cut more aggressively than it should. If you underfile the depth gauge, the saw will cut slowly and inefficiently.
Equipment Required
Here’s the equipment you’ll need for filing the chain and how to use it in both sharpening the cutter and filing down the depth gauge to the correct height.
How to Sharpen a Chainsaw
Begin by clamping the saw in a bench vise or use a specially designed chainsaw sharpening clamp, either on a log outside, or fastened to a stout piece of lumber in your shop or garage.
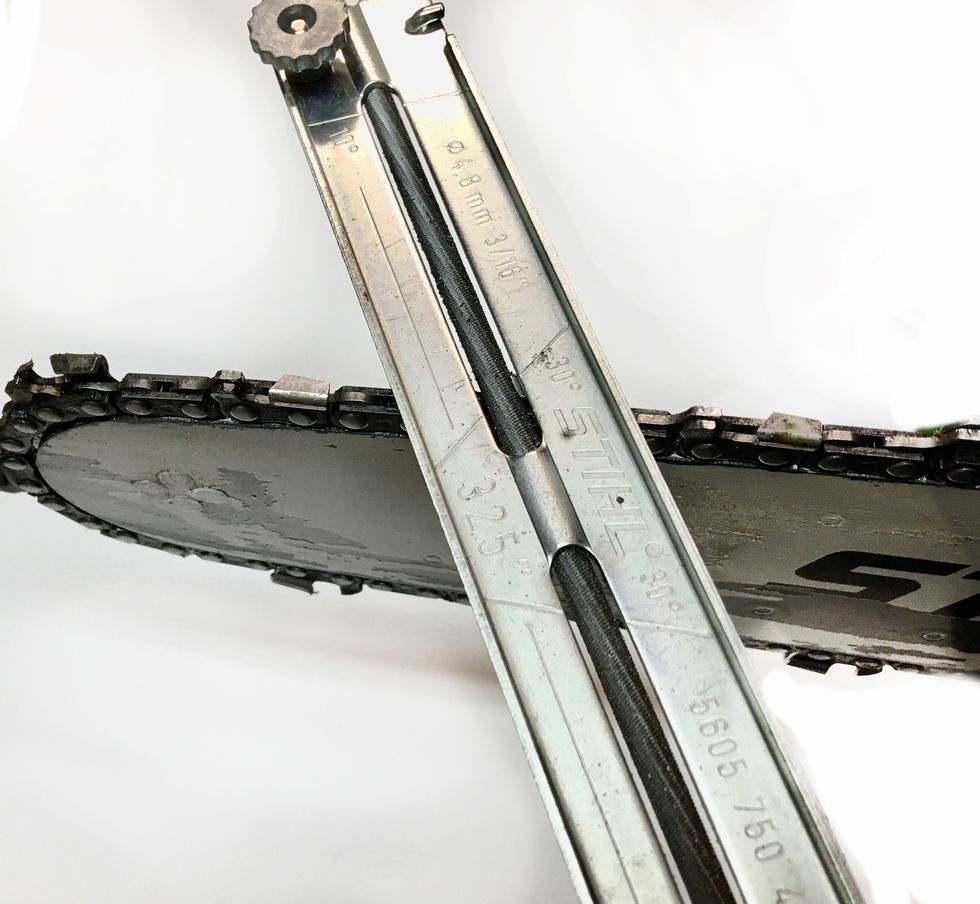
A saw file with its guide is a pretty simple instrument.
With the file seated in a cutter and the guide properly aligned, begin the sharpening process.
Depending on the saw chain and the saw manufacturer's recommendation, you'll also need to lower the depth gauge (also called the raker). You use another guide with a flat file to do this.
Position the guide on the saw chain and file the depth guide (raker)
Although they are more expensive than other sharpening tools, there is a specialized file and guide that both sharpens the cutter and files the depth guide (raker).
Using a combination saw file takes a little practice because it feels much different than using a single file in a saw guide or filing free hand.
⚠️ Engage the chain brake before you clamp the chainsaw’s bar in a vise. Disengage the brake as you rotate the saw around the chain to move the teeth in position for filing, then engage the brake again. If it’s a cordless chainsaw, remove the battery pack for safety.
What Else You Need to Know
There are a few other things that relate to chainsaw sharpening that you should know.
1 Clean the guide bar groove. The saw’s bar and the groove that the chain runs in will eventually get clogged with gunk. It needs to be cleaned. There are a variety of ways to clean this out, from using a specialized guide bar cleaning tool to the end on the depth guide shown above.
2 Most chainsaw bars are universal and can be turned over after several sharpenings to ensure even wear on the bar. Check whether your bar can be turned in this manner or look in the saw’s owner manual.
3 The chain racing around the bar will eventually create a small burr on the edge of the groove that the chain runs in. Remove this burr with a flat file.
4 Amateur woodcutters would do well to bring the saw and chain in for professional sharpening at the end of every woodcutting season, or after several years of use. As good as you may be at hand filing, the chain (and the saw itself) can probably use a little professional attention by a servicing dealer.
5 Some saws have a tip on the nose of the bar that can be greased. If your saw has one of these, it came equipped with a grease tool. Every time you sharpen, press the nozzle of the grease tool into the fitting and pump fresh grease into the tip of the bar, expelling dirty grease in the process.
6 Most manufacturers and many web sites tell you to wear gloves while sharpening saw chain. I admit that doing so can save you from a nasty cut. But, frankly, I’ve never been able to wear gloves while doing this work. I’ve tried it only to have been frustrated by the lack of dexterity caused by the gloves. Now I file carefully, being aware that I’m handling razor sharp chain. I admit that gloves are safer. Proceed as you see fit, but with caution.
Finding Your Equipment
Sharpening files and guides are sold at most home improvement stores, online, and at servicing outdoor power equipment dealers. The price for these files varies; a file, guide, and handle packaged together will cost somewhere between $7 and $10. The specialized files that file both the cutter and reduce the height of the depth gauge/raker are more expensive. These cost in the range of $30 to $40. People who use their chainsaw every day and file their saw every day usually don’t use these combination files, but part-time and amateur wood cutters may find them easier to use and more capable of producing a more consistent cutter geometry.
Bench-Top Sharpeners
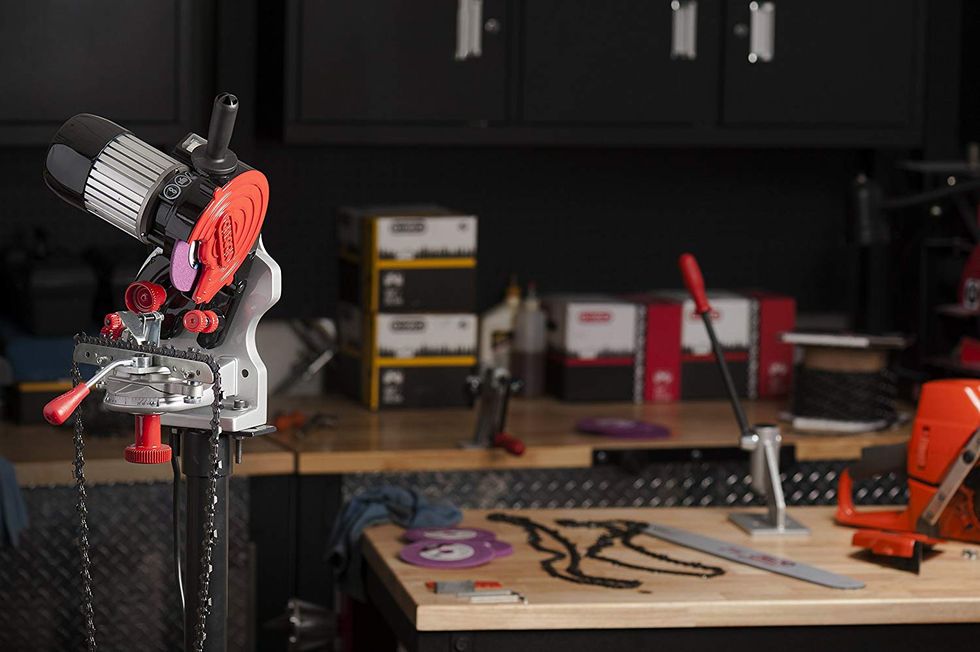
If you use a chainsaw all year, and especially if you own more than one chainsaw, then you can save a significant amount of time and energy by sharpening the saw chains with a bench-mounted sharpener. This style sharpener delivers the most accurate, consistent results.
The tool operates a bit like a power miter saw, but instead of a woodcutting blade, it’s equipped with a 4½-inch diameter grinding wheel. The wheel tilts up to 35 degrees left and right to accommodate the most common saw-chain cutting angles.
Start by clamping or screwing the sharpener to your workbench. Remove the saw chain from the saw and set it into the sharpener’s vise. Adjust the grinder to the proper angle, then squeeze the trigger and pull down on the upper handle until the spinning wheel contacts the cutting tooth on the saw chain. It only takes two or three seconds to sharpen the tooth.
Release the clamp, reposition the saw chain and repeat. As with filing, sharpen every other tooth, then readjust the grinding angle and sharpen the remaining alternate-angle teeth. A bench-top sharpener is certainly the most accurate way to sharpen a saw chain, but just as importantly it makes it nearly impossible to ruin a saw chain by grinding away too much material.


